Due to Parrot no longer actively maintaining the Github repo for this install script, I have ported it to a gist on my own account. I am now working to actively maintain it to ensure it continues working. As of Jan 13, 2020, it appears that the script is currently working as intended and the links on this blog have been updated to reflect its new location.
SPECIAL THANKS to Thunder Son for walking through this process with me after I failed to take notes the first time so he could help me grab screenshots and troubleshoot errors for this write up.
Recently I decided to take on the change of turning from Linux as my daily driver, specifically Parrot OS, and moving to Windows to take advantage of Windows Subsystem for Linux (WSL) alongside the versatility of other tools like Powershell. I really loved Parrot OS as a Linux distro and so I knew I wanted to be running this distro with all of it’s tools when I typed “bash” in Windows. After hours upon hours of errors, tinkering, and setup, I now have a fully working install with all tools of Parrot OS on WSL. Below is how I got there and some of the errors you may run into along the way if you attempted it yourself. Note that some native Parrot tools like “anonsurf” still do not function properly due to how WSL and networking work on the machine but I will be working to resolve those in later write ups. I have also done another write up on getting Nmap to “work” in WSL.
Without any further delay, here is what I did!
STEP ONE
Step one is, of course: install Windows Subsystem for Linux (WSL). This can be done by the “Enable / Disable Windows Features” window or by running the following Powershell command on any machine with Windows 10 version 1601 or later.
Enable-WindowsOptionalFeature -Online -FeatureName Microsoft-Windows-Subsystem-Linux
If you hadn’t installed this previously, you should reboot your machine after it completes. If you already had it installed, you can just proceed to the next step.
STEP TWO

WSL still won’t do anything if you type “bash” in Command Prompt or Powershell because it needs an actual distribution to load when you type bash. So we need a distro. I decided to install “Kali Linux” from the Windows Store. This only installs a barebones version of the OS and does not come with any of the tools but it’s a good Debian based foundation for where we are going.
STEP THREE
Open Command Prompt or Powershell and launch “bash”. This should boot you right into Kali Linux on the user account you created. At this point, it’s a good idea to make sure the Linux side of the system is fully up to date. Run the following:
$ sudo apt update
$ sudo apt upgrade -y
STEP FOUR
Install GNUPG. This is required for the Parrot install script to work. I don’t know why, but everything gets messed up if you try the next step without it. Learn from my mistakes and just install it.
$ sudo apt install gnupg
STEP FIVE
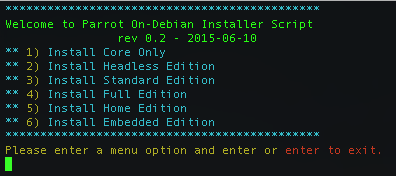
This is the big install! Now we will download the install script from a Parrot repo on GitHub and run it. This will take a while as it’s a full install. You can choose one of the other options but I can’t vouch for how/if they will work. I selected option 4 on the script for the full install.
$ wget https://gist.githubusercontent.com/the4rchangel/a679b8cd8e78f490b1b9c2bc6d95645a/raw/402dcc6bed50845553bac66f96df30d9a97946df/parrot-install.sh
$ sudo chmod a+x parrot-install.sh
$ sudo ./parrot-install.sh
Select “4” and you’re off! The install will take a while and when it finishes bash will be broken at first. If you exit bash and go to reopen it you will be met with an error that left me digging around for a little while. We’ll fix that in the next step.
STEP SIX
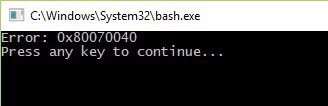
Something in the install script from the last step breaks bash. After reading around the internet for the error code, I found out that this is caused by the “resolv.conf” file on the Linux side. I don’t know what part of the process causes this error, but you can RESOLVE it (funny eh?) by navigating the file structure in Windows and deleting the “resolv.conf” file at the directory below. When you re-launch bash it will generate new, clean, and working “resolv.conf” file.
C:\Users\USERNAME\AppData\Local\Packages\KaliLinux.54290C8133FEE_ey8k8hqnwqnmg\LocalState\rootfs\etc\resolv.conf

Now if you try “bash” again you’re going to be logged in to Parrot OS.
STEP SEVEN
We can’t have our cake and eat it too. To install all of our favorite hacking tools (next step) we are going to have to set some exclusions in Windows Defender. I made the mistake of not doing this the first time and my Defender went crazy with notifications when I first tried to run the command in the next step. Choose your own way for this method, I opted to do it by a folder exclusion at:
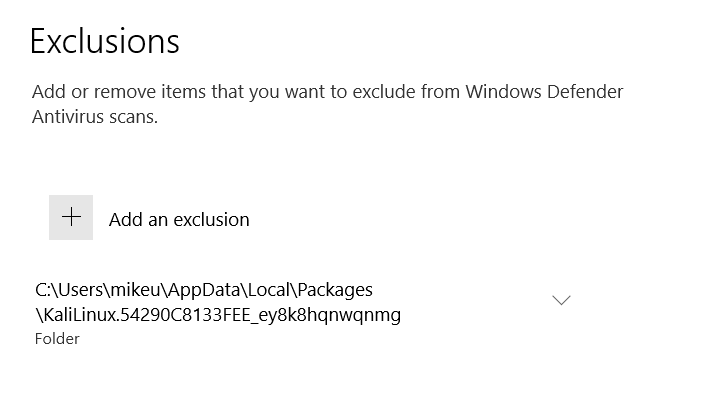
With this, everything in my Linux distro should be safe from scanning and allow the rest of my machine to stay behind Windows Defender.
STEP EIGHT
At this point you have the core system and you’re free to hang out here. However, just like Kali on Windows, we don’t have all of our beloved Parrot OS tools available and it doesn’t make a ton of sense to stop right here after all of that. To start the (LONG) install of the whole toolset, simply run:
$ sudo apt install parrot-tools-full
STEP NINE
All that’s left to do now is enjoy running Parrot inside your Windows installation. At the time of writing this I am only less than 24 hours in on using the system this way and I haven’t uncovered all the kinks that I have no doubt will come with this. I know that the popular “anonsurf” doesn’t work and I will try and fix that. I also know that as with all WSL setups, Nmap doesn’t work Linux side but can be called from the Windows side easily through an alias.
If you run into any errors along the way, have any tips regarding this, or anything else, feel free to let me know in the comments here or on Twitter.